James Paulson's roll off roof observatory at the Sunridge Observatory site, taken in the summer of 1986, housing a 10 inch f/5 Cave Astrola Newtonian reflector telescope


Wednesday, April 11, 2012

Affordable CCD Imaging from Orion


Orion’s new StarShoot G3 imaging camera at around $500 is a reasonably decent entry level CCD imaging system for beginners. The camera features a ½ inch format CCD as well as thermoelectric cooling (TEC) to help keep that sensor cool and noise free during those warmer months. While there are several imaging systems priced well above this that exceed it in specs, this handy little unit also has an ST-4 port on it that allows it to double as an autoguider as you grow your imaging system. The unit features a 752 x 582 pixel array as well as 16 bit A/D conversion. The pixel array is 8.6 x 8.3 microns so it is capable of reproducing fine details.

This unit comes with a removable 1.25” nosepiece and works as well with 2” focusers. It comes supplied with USB and 12 volt power cords. It is available in both monochrome and color models.

One weakness that I have read about on the reviews of this product are the software, but Orion has been working on this and has improved it. And while you can get a DSLR for around the same price, you will not get the cooling features of this unit

Tuesday, January 17, 2012

Nice Amateur Observatory Design


Amateurs are building some really amazing observatories these days to house their gear in. I recently ran across this one on a favorite website and am simply amazed at how far they have come. This particular one features a seperate heated control room where imaging can be performed with relative comfort while the telescope sits exposed to the elements.

Inside the dome sits a myriad of equipment and wiring to control the mount and camera gear remotely. This is a fantastic setup.

Sunday, November 20, 2011

Dealing with Dew Issues


One of the problems that amateur astronomers in humid climates needs to combat is the problem of dewing. Dew will form on a corrector plate, eyepiece, lens or secondary anytime they are exposed to the atmosphere and cool faster that the surrounding air. This is especially compounded if the relative humidity is high. The dew point is classified as the temperature at which the relative humidity is equal to 100%

Fortunately there are solutions. Today’s amateur can choose from a variety of electronic controllers and resistive-heating dew straps to wrap around their optics and drive the temperature above that of the surrounding air and keep their optical elements clear.

I recently took the plunge and purchased the Dewbuster controller. The Dewbuster is a premium controller in that it uses a temperature probe to sense the ambient air temperature as well as the dew strip temperature and allows the observer to make a precise setting so as not to create secondary seeing issues caused by applying too much heat. This controller is noted also for its lower power consumption, which may be an issue to consider during long imaging sessions.


To supplement the Dewbuster, I have also purchased the Dew Not dew strips from Agena Astro. These affordable strips are Kendrick compatible and are known for their lower than average power requirements.

This combination will allow me considerable more time under the stars in Spring and Summer when dew is a real issue in my climate. There have been many nights where I have cut short because of moisture issues, and this will help alleviate it completely.


Sunday, October 30, 2011

iPhone Astronomy


One of the most interesting products that I have seen lately is this nifty bracket designed for coupling your iPhone to the telescope to use the camera feature and take snapshots. While this device is a bit pricey, it is quite revolutionary because it allows people to take their existing devices and shoot some nice moon and planet shots. The SteadyPix Telescope Afocal Adapter for iPhone is available from Orion. It is a bit pricey but it is also quite useful for daytime photography.


Another interesting iPhone product is the app known as Starseeker. This app allows you to control your telescope either via cable or through wi-fi. This app is also available from Orion. This app may be better suited for use on the iPad because ot it’s larger viewing screen.

It is quite amazing how this device can integrate into astronomy applications, particularly if you are already using one out at the telescope.

Tuesday, October 4, 2011

Planetary Imaging of Jupiter at Opposition


Jupiter reaches opposition this month. Opposition is the time when we are closest to the planet. Essentially this means the Earth is between the planet and the sun. It rises as the sun sets, and when it is high in the sky the views of it are at their absolute best.

Jupiter is a fantastic planet for visual observation. On an evening of good steady seeing, you can pour on the magnification and make out many details. For imagers using high frame webcams, they can produce results that rival what professional astronomers of only a few years back could accomplish. One observer, Anthony Wesley even managed to be the first to image and "discover" a large impact scar on the planet during an evening of routine amateur imaging.

The image above was shot last evening by John Kramer using a Meade LPI on a Meade LS8 ACF telescope using a 2X barlow lens and stacked in Registax. It displays the great red spot and the shadow of one of the moons. This is very affordable equipment, although the telescope is a high end self aligning SCT using an approximately 4000 mm focal length. This is a stack of approximately 250 images.

Monday, September 26, 2011

My Evolving Battery Box


My battery box (I call it my powertank) continues to evolve to meet my needs and is now outfitted with two seperate and fused 12 volt sources of electricity and a 400 watt modified sine wave inverter. This will provide me with all the juice I need to run my 12 volt laptop charger, the telescope, dew heaters and lights if needed. The red light comes in handy in the dark when working with my imaging gear, it gives me a bit of low level illumination to assist with slewing and cables and remains off most of the time. The charger shown in the background is a 3 stage unit that Walmart sells and is ideal for maintaining the 105 amp hour deep cycle battery in the box.

An added benefit of this unit is that in the event of an electrical outage, it will power the small fan on my woodstove to allow me to heat my home in an emergency, or power a radio for emergency information, so it really serves multiple purposes.

Sunday, September 18, 2011

PHD, the Orion Mini Guider a Meade DSI


Recently I ran across an article outlining the function of the brain settings in PHD guiding 1.13.0b and I decided to use this as a basis to tweak my setup. The Orion guider is unique because of its short focal length, so some of the parameters will require some adjustment from the stock setup in order to function well. Here is how I set mine up.

RA Aggressiveness - This function determines what percentage of the correction will be applied to the RA axis. The recommendation is to set this setting somewhere between 80 and 100%. I have set mine to 90.

RA Hysteresis - This function applied the correction ahead of time, in anticipation of the correction required based on the history of the correction. The default recommendation is 10 and this is what I have set mine to as well.

Min Motion (pixels) - this is the minimum amount in pixels that the star is allowed to move without correction. The default is 0.15 and it is not recommended to move lower than this, however because I am using a much shorter focal length guide scope, I have lowered this value to 0.10 because a smaller drift on a shorter focal length is equal to a longer drift on a longer focal length. This just tightens up the reaction time.

Calibration step (ms) - this parameter determines the length of the pulse sent to the hand controller to signal changes in movement. This number is also dependent on focal length, shorter is a larger number. I have set mine to 2100 and likely can increase this by 200 more to tighten down on the number of steps needed to do a calibration routine.

Dec Guide Mode - I set mine to Auto

Dec Algorithm - I have set mine to resist switching. This keeps the lash loaded on one side of the mount since all of the drift in declination due to poor polar alignment will always be in one direction. This is a given.

Dec Slope Weight - set mine to 5.00

Max Dec Duration (ms) - this number will vary depending on the quality of your polar alignment. It is not recommended to go over 500 or you have a serious alignment issue. I have set mine at 150

Star Mass Tolerance - setting this to 1.00 turns it off and this is the recommended setting. I have set mine to 0.50

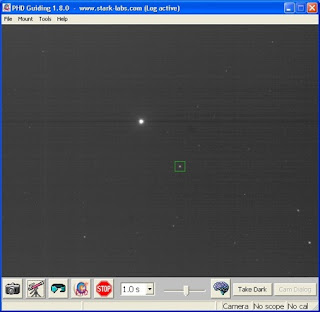
Exposure time - I am finding that limiting mine to 1 second gives me adequate stars to guide with. It is never recommended to exceed 3 seconds on this or all of the corrections will be applied in one axis only. The recommended setting is about 2 seconds because that lies somewhere between the actual error and the correction signals needed to compensate without actually chasing the conditions in the sky so to speak.

I hope this information helps others who are using this particular setup. Your mount may vary as I am applying these corrections to the LXD75 mount via ASCOM and other mounts may react slightly different, particularly in the length of the guide pulse sent to the RS-232 port so be forewarned that you may have to do some tweaking on these settings.