James Paulson's roll off roof observatory at the Sunridge Observatory site, taken in the summer of 1986, housing a 10 inch f/5 Cave Astrola Newtonian reflector telescope


Sunday, November 20, 2011

Dealing with Dew Issues


One of the problems that amateur astronomers in humid climates needs to combat is the problem of dewing. Dew will form on a corrector plate, eyepiece, lens or secondary anytime they are exposed to the atmosphere and cool faster that the surrounding air. This is especially compounded if the relative humidity is high. The dew point is classified as the temperature at which the relative humidity is equal to 100%

Fortunately there are solutions. Today’s amateur can choose from a variety of electronic controllers and resistive-heating dew straps to wrap around their optics and drive the temperature above that of the surrounding air and keep their optical elements clear.

I recently took the plunge and purchased the Dewbuster controller. The Dewbuster is a premium controller in that it uses a temperature probe to sense the ambient air temperature as well as the dew strip temperature and allows the observer to make a precise setting so as not to create secondary seeing issues caused by applying too much heat. This controller is noted also for its lower power consumption, which may be an issue to consider during long imaging sessions.


To supplement the Dewbuster, I have also purchased the Dew Not dew strips from Agena Astro. These affordable strips are Kendrick compatible and are known for their lower than average power requirements.

This combination will allow me considerable more time under the stars in Spring and Summer when dew is a real issue in my climate. There have been many nights where I have cut short because of moisture issues, and this will help alleviate it completely.


Sunday, October 30, 2011

iPhone Astronomy


One of the most interesting products that I have seen lately is this nifty bracket designed for coupling your iPhone to the telescope to use the camera feature and take snapshots. While this device is a bit pricey, it is quite revolutionary because it allows people to take their existing devices and shoot some nice moon and planet shots. The SteadyPix Telescope Afocal Adapter for iPhone is available from Orion. It is a bit pricey but it is also quite useful for daytime photography.


Another interesting iPhone product is the app known as Starseeker. This app allows you to control your telescope either via cable or through wi-fi. This app is also available from Orion. This app may be better suited for use on the iPad because ot it’s larger viewing screen.

It is quite amazing how this device can integrate into astronomy applications, particularly if you are already using one out at the telescope.

Tuesday, October 4, 2011

Planetary Imaging of Jupiter at Opposition


Jupiter reaches opposition this month. Opposition is the time when we are closest to the planet. Essentially this means the Earth is between the planet and the sun. It rises as the sun sets, and when it is high in the sky the views of it are at their absolute best.

Jupiter is a fantastic planet for visual observation. On an evening of good steady seeing, you can pour on the magnification and make out many details. For imagers using high frame webcams, they can produce results that rival what professional astronomers of only a few years back could accomplish. One observer, Anthony Wesley even managed to be the first to image and "discover" a large impact scar on the planet during an evening of routine amateur imaging.

The image above was shot last evening by John Kramer using a Meade LPI on a Meade LS8 ACF telescope using a 2X barlow lens and stacked in Registax. It displays the great red spot and the shadow of one of the moons. This is very affordable equipment, although the telescope is a high end self aligning SCT using an approximately 4000 mm focal length. This is a stack of approximately 250 images.

Monday, September 26, 2011

My Evolving Battery Box


My battery box (I call it my powertank) continues to evolve to meet my needs and is now outfitted with two seperate and fused 12 volt sources of electricity and a 400 watt modified sine wave inverter. This will provide me with all the juice I need to run my 12 volt laptop charger, the telescope, dew heaters and lights if needed. The red light comes in handy in the dark when working with my imaging gear, it gives me a bit of low level illumination to assist with slewing and cables and remains off most of the time. The charger shown in the background is a 3 stage unit that Walmart sells and is ideal for maintaining the 105 amp hour deep cycle battery in the box.

An added benefit of this unit is that in the event of an electrical outage, it will power the small fan on my woodstove to allow me to heat my home in an emergency, or power a radio for emergency information, so it really serves multiple purposes.

Sunday, September 18, 2011

PHD, the Orion Mini Guider a Meade DSI


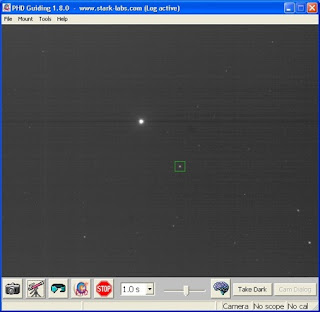
Recently I ran across an article outlining the function of the brain settings in PHD guiding 1.13.0b and I decided to use this as a basis to tweak my setup. The Orion guider is unique because of its short focal length, so some of the parameters will require some adjustment from the stock setup in order to function well. Here is how I set mine up.

RA Aggressiveness - This function determines what percentage of the correction will be applied to the RA axis. The recommendation is to set this setting somewhere between 80 and 100%. I have set mine to 90.

RA Hysteresis - This function applied the correction ahead of time, in anticipation of the correction required based on the history of the correction. The default recommendation is 10 and this is what I have set mine to as well.

Min Motion (pixels) - this is the minimum amount in pixels that the star is allowed to move without correction. The default is 0.15 and it is not recommended to move lower than this, however because I am using a much shorter focal length guide scope, I have lowered this value to 0.10 because a smaller drift on a shorter focal length is equal to a longer drift on a longer focal length. This just tightens up the reaction time.

Calibration step (ms) - this parameter determines the length of the pulse sent to the hand controller to signal changes in movement. This number is also dependent on focal length, shorter is a larger number. I have set mine to 2100 and likely can increase this by 200 more to tighten down on the number of steps needed to do a calibration routine.

Dec Guide Mode - I set mine to Auto

Dec Algorithm - I have set mine to resist switching. This keeps the lash loaded on one side of the mount since all of the drift in declination due to poor polar alignment will always be in one direction. This is a given.

Dec Slope Weight - set mine to 5.00

Max Dec Duration (ms) - this number will vary depending on the quality of your polar alignment. It is not recommended to go over 500 or you have a serious alignment issue. I have set mine at 150

Star Mass Tolerance - setting this to 1.00 turns it off and this is the recommended setting. I have set mine to 0.50

Exposure time - I am finding that limiting mine to 1 second gives me adequate stars to guide with. It is never recommended to exceed 3 seconds on this or all of the corrections will be applied in one axis only. The recommended setting is about 2 seconds because that lies somewhere between the actual error and the correction signals needed to compensate without actually chasing the conditions in the sky so to speak.

I hope this information helps others who are using this particular setup. Your mount may vary as I am applying these corrections to the LXD75 mount via ASCOM and other mounts may react slightly different, particularly in the length of the guide pulse sent to the RS-232 port so be forewarned that you may have to do some tweaking on these settings.

Tuesday, September 13, 2011

Getting Here!!!


This picture represents my first ever prime focus digital astrophotograph of a deep sky object. It is a stack of exposures shot with my Canon 1000d at ISO 1600 with about 15 - 2 minute exposures and stacked with Deep Sky Stacker, processed for levels and curves in PhotoShop CS5.

But getting here has been an experience. When I was looking for a scope, I looked at many. I knew I wanted to do astrophotography, so I eventually settled on the SN6 on the LXD75 mount. I wanted a light scope on this mount so that I could add some things to it because I know that things never stay stagnant. You can trace back in this blog and see the path I have taken to get here.

The first thing I added to it was an accessory bracket which I had custom made. This rail was used to piggyback a camera and later was to allow me to mount my guidescope on this OTA. I went on to purchase a dew shield, and built a home made power tank for it. I then purchased a DSLR, an LPI, an ST-80, a second counterweight, a motorfocus, and later a DSI for guiding. I added a red dot finder to assist in aligning it.

After being frustrated with the weight of the assembly, I purchased the Orion mini finder-guider and removed the ST-80. This helped a lot. In the process of learning this I damaged a RA motor assembly and had to replace that as well. I purchased BackYardEOS for camera control, and later, a laptop and 12 volt charger for it. And only recently after learning the hard lessons of proper balance, proper polar alignment, and even finding my focus points for my guide camera and imaging camera on daylight targets have I reached the point where I can begin to do some imaging.
I still have to learn processing techniques so I can enhance my data. But I am slowly getting there with it. On my last run, I had PHD guiding this system perfectly and everything seemed to be right on track.

The hard lessons on this are the simple ones. There is no easy road. If you are patient and meticulous, and can follow procedures and are tedious about how you do things, you stand a chance of getting results. There are a lot of things that can go wrong, but I can't stress enough that this is not an easy process and there is no quick way to learn it. You need to read lots of advice and listen to others, and you need to get out an practice with your own gear and find the limits of what it can do.
All in all I am pleased with this image of M27. Down the road I hope to get far better images, but just getting this far has put me in the ballpark to do this with at least some success. And that in itself is a milestone accomplishment to me.

Wednesday, August 24, 2011

The Equipment War

It is really easy to get involved in buying a lot of equipment in this hobby. I know first hand having spent a lot of money over the years on things in the learning process.

But honestly, there is nothing greater than using minimal equipment to pursue this hobby in many ways. The simpler you can keep your setup, the more it will be used.

Astrophotography is a different animal. It demands a lot of equipment and patience in setting it all up for an evening of imaging. Lots of things to go wrong. Some wonder why we do it. The answer is simple, it is what we enjoy about his hobby.

I like to play with cameras and electronics. Capturing images is an art in itself. You plan your shots carefully and there is a process of events that takes place to actually get a result. Unlike visual work, it can be very tedious from acquisition to focus to capture to tear down, it is all about the process.

A pure visual observer struggles to understand why we want to do this. Those of us who do this can't understand why more visual observers are unwilling to take the next step in the hobby and begin to save their memories forever.

And the battle rages on to this day.

Saturday, August 6, 2011

A Computer for Astronomy


I finally reached the point of having to buy a better computer. I usually don't spend money on computers much because things change so rapidly and I can get by with older machines for quite a while. But getting into imaging and working with images placed some demands on my needs.

I purchased the Dell Inspiron N5030 from Walmart. This is a very basic laptop with a 320 gig hard drive and 3 gigs of RAM and comes equipped with Windows 7 Home Edition (64 bit).

I have loaded this laptop pretty much for astro usage. I have Deep Sky Stacker which is used for stacking images, as well as Canon Utilities (for the camera driver for my DSLR), BackyardEOS for image acquisition from the DSLR, and PHD Guiding to perform my autoguiding functions.

Additionally I have added some other things. I have installed Stellarium which is a very nice planetarium program, Adobe Photoshop CS5 for processing images, Autostar Envisiage for use with my DSI, and AutoStar Suite for mount control and positioning. Since this laptop came without a serial port, I also added a Keyspan USB to RS-232 to it as well.

I approach computers as nothing but a tool. It should serve some useful function, and in this case it has a purpose. And I really felt the need to move to Windows 7 as most new things will come equipped to use it, and it is a modern operating system with some shelf life to it. After all, we have extracted almost 10 years out of Windows XP at this stage and soon it will be going away. It was simply time to move on and modernize and look at it as an investment into the usefulness of my gear.

Sunday, July 24, 2011

Eyeball Astronomy


There is nothing more relaxing than taking a chair out into the yard and looking up at the stars. The night time air is usually cooler and the sounds of the night are themselves a unique experience. If you can find a dark area of the yard away from streetlights and allow your eyes to dark adapt well you will see much more.
Two things can really make this more interesting. One is a planisphere. You can use this planisphere along with a red flashlight to help identify constellations. The other is a green laser pointer, which you can use to outline constellations and provide some visual boundaries for your eyes. If you use a GLP please be aware of the restrictions and dangers around aircraft, and never shine the beam from one of these in any other participant's eyes.
It costs nothing to do astronomy like this, and it is very relaxing for your eyes to simply "hang out in the dark. "

Tuesday, July 19, 2011

A Boy and His Telescope


It is a cold, bright sunny day in the deep of winter in 1973. The sun is deceiving because the temperature outside is just a bit above zero. There is heavy snow on the ground, almost two feet deep in places.

"Son", she hollered, "what are you doing?” "I'm going outside to build a snow fort Mom" he said. "Wear your winter boots, its cold out there." He largely ignored her because he is in his own world.

As the afternoon progressed, an area in the front yard is transformed from a knee deep area covered in snow into a cleared spot with four tall walls made of snow blocks. The sun began creeping lower in the clear blue afternoon sky, and the cold air was deceiving, you could see your breath in it.

"Get in here and get cleaned up, it's almost time to eat", she said. "Yes Mom" he replied.

After dinner, he went to his room, and dug out his telescopes. He had a 40mm refractor with a fixed eyepiece on a shaky tripod, and a 50mm refractor on an equally shaky tripod but this one allowed the Japanese sized eyepieces to be removed and changed out. Somewhere along the way, he had collected his Dad's binoculars, a nice 7 x 50mm pair of Nikon's. All of this was carried carefully out to the snow fort, along with a planisphere.

And on this dark moonless night, somewhere in the Cypress Hills in the small town of Elkwater, Alberta, Orion began to appear in the sky. There it was, the great Orion Nebula. Sirius, the dog star shone brightly in the cold winter night’s air. Where is M41? Hey look, there is the Pleiades, get the binoculars. Snow makes great chairs because you can mold it and lay in it comfortably as long as you are dressed warm. There is Taurus; hey there are the Hyades, oh WOW!!!

At 9 PM it was time to come in. But a whole lot had been gained that evening. And in the evenings to follow, the knowledge began to grow because with each new constellation learned it became easier to learn the ones beside them. New objects were added to the lists of things to see. New books were read.

Without even realizing it, I had spent that entire day building my first ever observatory, and although it's usage would be temporary at best, it served its purpose of keeping the light moving cold night air at bay and gave shield to the one distant streetlight. It served as a place to retreat with my telescopes and enjoy my boyhood hobby. Armed with only the limited gear at hand, a planisphere, and a desire to know more about the night sky, these are the humble roots of an amateur astronomer. And what's funny is to this very day, nothing has changed.

Monday, July 18, 2011

Why We Observe


Have you ever wondered what drives someone to get up in the middle of the night and pack a telescope outside to be alone and look up at the stars?

Think about this. Ever since the beginning of time, mankind has been looking at the stars. In the past, they became the centers of great tales of folklore. Mankind has always dreamed of what answers they may hold.

Today our view of the heavens is diminishing rapidly. Not so long ago, and even in America, people could step outside into their backyards and look up on a summers eve and see the band that we call the Milky Way galaxy. On the astronomical time scale, 50 years is insignificant.

Yet it is this same diminishing view that drives those of us who do this hobby, to seek that time alone, when we sync with all that is out there, and inhale photons from a time long before the arrival of man on this planet, even before this solar system began. We are driven to photograph and observe and share the experience with others, to wonder aloud of all the promises that space holds for us as a species, and just for one brief shining moment to forget all our earthly concerns and realize in some small way how insignificant we truly are. We are tour guides of this amazing place we call the cosmos. We use our tools to learn and share. It is our nature. We differ very little from the warrior hunters of the past who looked up and saw virtually the same things we are looking at tonight, for in the cosmos, mans place is almost non-existent.

Saturday, July 16, 2011

The Basics of Astrophotography


If you are reading this article, there is a very good possibility that you are interested in learning more about astrophotography. Perhaps you own a camera like the one pictured above and believe that you would like to try your hand at taking some sky shots. Good. This is how it begins. And how far you go with it is up to you and your budget.


You will need a tripod and a remote timer or cable release for an older 35mm SLR. At the very minimum, you need a means of keeping the camera stationary, and a means for tripping the shutter. The adjustable alt-az head may be nice for framing but is completely optional. With this setup, you can do about a 30 second exposure with fast film or high ISO settings and achieve some interesting results. This is the least expensive and least intrusive means of getting into astrophotography. In many ways it is also the most fun because at no point will you invest less energy and achieve greater satisfaction than when beginning at this point. The problem is, most guys get hooked at this point and they want to get up to the next level. You can do this fairly inexpensively, providing you have a telescope on a tracking mount and a means to mount your camera on the tube.

This image shows my old trusty Minolta X-370 astrophotography 35mm SLR mounted on a special rail I had made for my telescope cradle. The nice thing about piggybacking is that with short focal length lenses like the 50mm f/2, and even fairly decent polar alignment, you can achieve some very spectacular results because you can now increase your exposure times from over 30 seconds to perhaps 30 minutes or more, depending on your sky conditions. I have always enjoyed this type of astrophotgraphy because it requires minimal intervention and delivers excellent results in a consistent way. You can substitute a DSLR in place of this camera and do about the same thing, taking a number of successive shots and later stacking the images with Deep Sky Stacker to achieve a very long exposure time equivalent. Digital technology is superior to the old film in that if you get a bad frame from something like a jet or a satellite you can simply leave the frame out, not so with the old methods.

If you don't own a DSLR, a cheap way to get into imaging is with something like the Meade Lunar and Planetary Imager, the LPI. The LPI and a laptop allows you to shoot images of the moon and planets. This webcam device can deliver many hours of enjoyment and will allow you to begin to use software for capture and control of your equipment. At this stage you will want a good equitorial mount with the ability to track sky objects, and a barlow lens or two to achieve a better image scale. The degree of difficulty is higher than with piggyback work simply because focus becomes more critical as does the ability of the mount to carry the load and track properly.

By this point you are very interested in doing this astrophotgraphy thing. In the days before autoguiders and digital cameras, a setup like the one pictured could let you couple your camera to your telescope and guide the stars with a fairly high precision manually, at least good enough for film. Doing this with today's technology is even more interesting.

First you will need a T ring and T adapter. This allows you to couple your camera to the focuser on your telescope. You will need a means to control your camera. You can do this with a remote timer, or even with software like BackyardEOS, which is what I am now using. And you will need a means of guiding. Guiding is a process of making minute corrections in your tracking that are sufficient for your image scale to make images appear pinpoint without egg shaped stars. More often than not, this is being done with autoguiding, a means whereby a second camera is being used in conjunction with a software package like PHD Guiding.

This final image shows a setup similar to this mentioned, where the camera lens is now the telescope. This is called prime focus. You can see the guide camera and guide scope on the right, and the camera coupled along with a T ring and T adapter to the focuser. Beyond this you may wish to place specialized imaging cameras at prime focus to do even more precise work, but be warned, by the time you get to this stage your investment will be considerable and your knowledge will be very extensive. Many make the mistake of beginning at this stage, and although they eventually get fairly good at it, they find the curve to get there pretty steep. Plus I just think you miss out on a lot of the joy of what this is all about if you don't go through the steps first. Hopefully this article will help someone out there to be inspired to become the world's next astrophotographer.

Wednesday, July 13, 2011

My Little Telescope Team


Here is what I am now using to do all of my astronomy. This has been two years in the making, buying a bit of gear here and there, some of it was rescued, and all of it has been used. At the heart of my equipment is my well equipped LXD75 SN6. I have purposely built this system to be an imaging system, however it has the capability to also be used visually. Most recently I have had to replace the right ascension stepper motor drive, most likely a victim of a bad power cycling experience in the dark. I am complimenting this system with an old rescued Meade Telestar, which is also a GoTo model telescope. When I began this endeavour, I started off with the Garret Optical 15x70 binoculars being used on the Orion Paragon tripod package, and while the tripod does work, it is not without its weaknesses alike. I picked up the Short Tube 80 model telescope to use as a guidescope mounted on an accessory bracket that I had custom fabricated to mount on the SN6 cradle. Below the ST-80 sits the power supply center for the evening.

This closeup shot of the SN6 reveals a few new additions that I have added to my unit. I found the ST-80 to be very heavy on the scope as a guidescope, and some of this may have had to do with placement, so I have purchased the Orion mini-guider and mounted it into the stock Meade finderscope's location. I have also modified an Orion electronic focuser to be used on my unit to provide for more simplistic camera focusing which can be a very difficult task at the best of times. The accessory bracket is also visible and will be a great spot to do piggyback astrophotography. The Meade DSI unit installed in the mini guider will make an excellent wide field camera as well to experiment with when it is not serving in its role as an autoguider.
Overall I really love all of what I have assembled. It cost me a fair price but not compared to many systems that I have seen out there on the web. It is all compact and lightweight and portable. I have the ability to do everything from lunar eclipses to deep space imaging. Not pictured in these photos is my accessory case with eyepieces, various brackets, a lunar planetary imaging camera, and my Canon Rebel XS DSLR. I have purchased a software package called BackyardEOS to use with the DSLR and in the little that I have used it I am very impressed with its features.

Tuesday, June 28, 2011

My Evening With John Dobson


I am one of the fortunate amateur astronomers in this world who had the chance to meet and spend some observing time with the man whose name is synonymous with the Dobsonian telescope.

I was 22 years old at the time, and it was the summer of 1985. Please forgive me if I have my dates wrong since it was 25 years ago, but it was either on Saturday August 3rd or Sunday August 4th of that year. I grew up in the small town of Elkwater in the Cypress Hills Provincial Park in Alberta, Canada. During that summer, Alberta Culture and Recreation had hired John to do a number of shows at various provincial parks in the province, and ours was one of them. I had a good interest in astronomy by this time and had spent a fair bit of time under the stars myself. This was at a period of time before John had become the legend that he is today. The only Dobsonian telescopes around in those days were the ones that people had made themselves, there was very little commercial production, or at least, nothing like there is today. The magazines Astronomy and Sky and Telescope were just starting to warm up to the idea of the "Dobsonian mount" as a viable model for a large aperture instrument with some easy to use characteristics and features.

During the late afternoon, John took his van down on the field and unloaded his sky canon. This was his smaller model telescope, it housed an 18 inch mirror, and it was huge. It was clearly the largest telescope that I had ever seen in my lifetime up to that point.

As darkness began to descend on the park, John took the stage at the amphiteatre, and gave a brief talk and showed some slides. One of the first things I noticed about him was that he had an eccentric turn to him, he just struck me as someone unlike anyone I had ever met in my life. Of course his background, being born in Beijing, spending years in the monastary, and holding a degree in Chemistry is a pretty unusual combination to begin with.

The evening weather was less than perfect. But just as he finished we got a break from the clouds, and a core group of people walked on down to the scope in the field, where as kids, we used to play baseball. There were maybe 10 people. John pointed his instrument at M57, and one by one people ascended the tall ladder to glance at the Ring Nebula. I was treated to a view unlike anything I had ever seen before. There was no disputing what we were looking at. And clouds came and went and gradually people drifted away and returned to their campsites, but I stayed. I spoke with him a bit about the construction of this rather crude looking instrument that resembled a gun canon from a war ship more than a telescope. We had a chance to view a couple of more objects, M27 and M71 and they were equally breathtaking. At the end of the evening I helped him to remove the scope from its mount and load it in the van, shook his hand and thanked him very much for the chance to look through this large scope.

I had no idea at the time of the legend of a man I was meeting, but I knew that I wanted to keep doing astronomy. Within two weeks I had bought my first real camera for doing astrophotography, and started to build the base for a domed observatory to house my 6 inch scope, which I never completed. Within two months I was on my way to pick up my Cave 10 inch scope, and the following summer I built my roll off roof observatory. I really think that hour or two I spent with John Dobson convinced me that this was a valid and fantastic hobby. And if I was into this hobby before then, that time we spent together put me in with both feet and my face to the fire.

Saturday, June 25, 2011

Upgraded Powertank


I went ahead and added a 400 watt inverter to my power box in order to accomodate my laptops. I am going to run a pair of laptops, one older one with an RS-232 serial port for guiding and a newer one that has considerably better battery life for running my camera with BackyardEOS.

I added a 105 amp hour marine deep cycle to the case at the same time. Walmart now sells only the hybrid deep cycle but this unit delivers almost 25 additional amp hours over their old deep cycle battery and I have a 3 stage battery charger to keep it properly conditioned. I think this should be enough to power all of my needs for an evening.

And if not, I have other options. I can use the battery pack for the telescope in an emergency, or get a second battery box and gang it alongside this unit in parallel and double my capacity.

Friday, June 24, 2011

Rescuing an Orphan


I had this Meade Telestar telescope given to me several months ago, it was headed for the trash can. It had one broken leg and was missing several components including eyepieces, the eyepiece to the finder scope, bolts for the accessory tray and the Autostar controller.

I brought the OTA in the house the same day I got it and set it in my telescope den. The mount stayed in my car up until last week when I finally decided to get it out of there and see if I could repair it to get this OTA up off the floor. Honestly I had written the mount off and was intending to build a Dobsonian mount for this scope.

I had never paid attention to the aperture of this scope, I guess I just assumed it was a 4.25" reflector, but the specs came out that it is a 5.1" f/7.9 OTA, and the included 25mm eyepiece leaves it right around 40x, which is one of my sweet spots for observing. I also found in my "extras" collection that I had 3 additonal 0.965 OD eyepieces that I could use with this scope that I got from an old discarded refractor that has since gone to telescope heaven. Since this is almost an f/8 they should work fine with it.

Upon examing the mount, I found that I could use some machine screws to repair the tripod leg. A good tightening of all the existing bolts and screws added some rigidity to the mount. In my "extras" collection I had a base for an MRRD finder from one I had ordered from Agena two years ago that was not being used. I removed the stock finder and rings and filled in the screw holes and mounted the new base and took the finder off my binoculars and installed and aligned it. I left the accessory tray off of it for now as it is awkward and not really well thought out.

All of the repairs have given me a decent little visual scope on an alt-azimuth mount that I can use manually for the time being. It will make a nice addition to my evenings when I am imaging with my Schmidt Newtonian and it has more aperture than my binoculars or my ST-80. It also makes a nice little grab and go because I can carry the entire assembly out the door without taking it apart. I am going to look for an Autostar controller for it and see if the motors are still functional, but even if they are not, I am perfectly content to use it in manual mode. I enjoyed refurbishing this scope and soon I will know how it performs.

Sunday, June 19, 2011

A Beginner Astrophotography Bundle


Let's say you are interested in learning the ins and outs of doing some very basic attempts at sky shots, but you don't want to spend a whole lot of money right up. Perhaps you are primarily a visual observer who owns a Dobsonian telescope but has a passing interest in learning astrophotography without starting at the top of the price curve. At $159, the Orion Adventures in Astrophotography Bundle is an excellent concept and a simple product that will allow you to take your DSLR (or 35mm camera) and crank out some excellent wide field results.

I have built a setup similar to this using my LXD 75, a dovetail and the exact same camera mounting bracket shown in this picture for doing much the same thing. Using this is very simple, you simply align the polar axis of this mount to polaris, install your camera (with remote) to the mount and point it, turn on the tracking, wait about one minute and begin shooting. A setup like this can be imaging with your camera on an undisturbed mount for hours at a time while you casually browse the universe with your primary telescope. This device would be excellent for recording things like meteor showers, making a large view of the milky way, comet photography, or anything else that lends itself to some interesting wide field shots.

Personally I love doing wide field astrophotography and have been doing it for years. It is highly forgiving on polar alignment, generally does not require guiding (merely tracking) and can produce some really stunning results that do not require a tremendous amount of effort or setup time. If you have purchased this bundle, I would enjoy hearing from you.

Saturday, June 18, 2011

Planetary Observations

One of the simplest things for a beginner to enjoy are the views offered through a telescope of the planets. Jupiter and Saturn are two of the most amazing sights many first timers will ever experience in a telescope, and a quick trip with Google will help you in locating their positions in the night sky. Venus, Mars, Jupiter and Saturn are all fairly easy to spot as they tend to be brighter than the stars around them at various points of their apparitions. Viewing the outer planets is best done when the planet is at opposition (planet rises as the sun sets) as it crosses near the meridian, an imaginary line that transits from due north to due south, directly overhead, which happens generally between midnight and 1 AM.

Planetary viewing requires patience, good seeing, and on those nights of exceptional seeing when you can pour on the magnification, you will be rewarded with amazing details in your observations. Aperture is king here. Telescopes can generally handle up to a maximum of 60 times magnification per inch of aperture in theory, but often the atmosphere will forbid much above 150x on most nights. Still when you hit those special nights of exceptional clarity and pour it on, you will be amazed.


A selection of filters can help in your viewing of details as filters allow transmission of only specific wavelengths and will block others to enhance the contrast of many details like ring divisions, belts, spots and caps. Most any astro retailer will sell a basic set of planetary filters to help get you started, but this chart located at the bottom of the page gives some very good information on specialized filters for specific needs.

As with anything visual, experience will help you a lot here. Getting out and looking at the planets with a variety of instruments helps you to learn to train your eye to see things that most would simply pass over, and it gives you a reference for what to expect during your oberving sessions. Good luck and get out and enjoy, soon Jupiter will be up in the evening and this is an excellent place to begin and learn.

Tuesday, June 14, 2011

I'm not collecting dust

It's been so long since I have made an entry on here I thought I might jot down a few words about what's been going on. I have taken a bit of time off to re-focus on things and have put my hobby on hold a bit, but lately I have been finding myself drawn back again. Something about the warm weather and the fact that I have made some progress on other things around me and my telescope pad has been sitting there looking at me wondering when it will get some use.

So the next clear and moonless night I am planning on digging my gear out for a night of great astronomy and some astrophotography. I have not even tried out my new autoguider yet so there is plenty to do and now that the weather is warm, it is time to get back to the hobby that I love and admire so much. My telescope is home and this is where it will stay. This weekend I will complete organizing my astronomy den, check over my gear, hang some astrophotos, and spend some time with some books. The healing is complete. Clear skies to all of you.