James Paulson's roll off roof observatory at the Sunridge Observatory site, taken in the summer of 1986, housing a 10 inch f/5 Cave Astrola Newtonian reflector telescope


Sunday, October 30, 2011

iPhone Astronomy


One of the most interesting products that I have seen lately is this nifty bracket designed for coupling your iPhone to the telescope to use the camera feature and take snapshots. While this device is a bit pricey, it is quite revolutionary because it allows people to take their existing devices and shoot some nice moon and planet shots. The SteadyPix Telescope Afocal Adapter for iPhone is available from Orion. It is a bit pricey but it is also quite useful for daytime photography.


Another interesting iPhone product is the app known as Starseeker. This app allows you to control your telescope either via cable or through wi-fi. This app is also available from Orion. This app may be better suited for use on the iPad because ot it’s larger viewing screen.

It is quite amazing how this device can integrate into astronomy applications, particularly if you are already using one out at the telescope.

Tuesday, October 4, 2011

Planetary Imaging of Jupiter at Opposition


Jupiter reaches opposition this month. Opposition is the time when we are closest to the planet. Essentially this means the Earth is between the planet and the sun. It rises as the sun sets, and when it is high in the sky the views of it are at their absolute best.

Jupiter is a fantastic planet for visual observation. On an evening of good steady seeing, you can pour on the magnification and make out many details. For imagers using high frame webcams, they can produce results that rival what professional astronomers of only a few years back could accomplish. One observer, Anthony Wesley even managed to be the first to image and "discover" a large impact scar on the planet during an evening of routine amateur imaging.

The image above was shot last evening by John Kramer using a Meade LPI on a Meade LS8 ACF telescope using a 2X barlow lens and stacked in Registax. It displays the great red spot and the shadow of one of the moons. This is very affordable equipment, although the telescope is a high end self aligning SCT using an approximately 4000 mm focal length. This is a stack of approximately 250 images.

Monday, September 26, 2011

My Evolving Battery Box


My battery box (I call it my powertank) continues to evolve to meet my needs and is now outfitted with two seperate and fused 12 volt sources of electricity and a 400 watt modified sine wave inverter. This will provide me with all the juice I need to run my 12 volt laptop charger, the telescope, dew heaters and lights if needed. The red light comes in handy in the dark when working with my imaging gear, it gives me a bit of low level illumination to assist with slewing and cables and remains off most of the time. The charger shown in the background is a 3 stage unit that Walmart sells and is ideal for maintaining the 105 amp hour deep cycle battery in the box.

An added benefit of this unit is that in the event of an electrical outage, it will power the small fan on my woodstove to allow me to heat my home in an emergency, or power a radio for emergency information, so it really serves multiple purposes.

Sunday, September 18, 2011

PHD, the Orion Mini Guider a Meade DSI


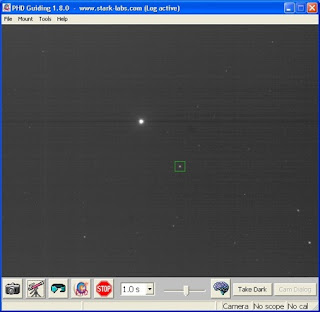
Recently I ran across an article outlining the function of the brain settings in PHD guiding 1.13.0b and I decided to use this as a basis to tweak my setup. The Orion guider is unique because of its short focal length, so some of the parameters will require some adjustment from the stock setup in order to function well. Here is how I set mine up.

RA Aggressiveness - This function determines what percentage of the correction will be applied to the RA axis. The recommendation is to set this setting somewhere between 80 and 100%. I have set mine to 90.

RA Hysteresis - This function applied the correction ahead of time, in anticipation of the correction required based on the history of the correction. The default recommendation is 10 and this is what I have set mine to as well.

Min Motion (pixels) - this is the minimum amount in pixels that the star is allowed to move without correction. The default is 0.15 and it is not recommended to move lower than this, however because I am using a much shorter focal length guide scope, I have lowered this value to 0.10 because a smaller drift on a shorter focal length is equal to a longer drift on a longer focal length. This just tightens up the reaction time.

Calibration step (ms) - this parameter determines the length of the pulse sent to the hand controller to signal changes in movement. This number is also dependent on focal length, shorter is a larger number. I have set mine to 2100 and likely can increase this by 200 more to tighten down on the number of steps needed to do a calibration routine.

Dec Guide Mode - I set mine to Auto

Dec Algorithm - I have set mine to resist switching. This keeps the lash loaded on one side of the mount since all of the drift in declination due to poor polar alignment will always be in one direction. This is a given.

Dec Slope Weight - set mine to 5.00

Max Dec Duration (ms) - this number will vary depending on the quality of your polar alignment. It is not recommended to go over 500 or you have a serious alignment issue. I have set mine at 150

Star Mass Tolerance - setting this to 1.00 turns it off and this is the recommended setting. I have set mine to 0.50

Exposure time - I am finding that limiting mine to 1 second gives me adequate stars to guide with. It is never recommended to exceed 3 seconds on this or all of the corrections will be applied in one axis only. The recommended setting is about 2 seconds because that lies somewhere between the actual error and the correction signals needed to compensate without actually chasing the conditions in the sky so to speak.

I hope this information helps others who are using this particular setup. Your mount may vary as I am applying these corrections to the LXD75 mount via ASCOM and other mounts may react slightly different, particularly in the length of the guide pulse sent to the RS-232 port so be forewarned that you may have to do some tweaking on these settings.

Tuesday, September 13, 2011

Getting Here!!!


This picture represents my first ever prime focus digital astrophotograph of a deep sky object. It is a stack of exposures shot with my Canon 1000d at ISO 1600 with about 15 - 2 minute exposures and stacked with Deep Sky Stacker, processed for levels and curves in PhotoShop CS5.

But getting here has been an experience. When I was looking for a scope, I looked at many. I knew I wanted to do astrophotography, so I eventually settled on the SN6 on the LXD75 mount. I wanted a light scope on this mount so that I could add some things to it because I know that things never stay stagnant. You can trace back in this blog and see the path I have taken to get here.

The first thing I added to it was an accessory bracket which I had custom made. This rail was used to piggyback a camera and later was to allow me to mount my guidescope on this OTA. I went on to purchase a dew shield, and built a home made power tank for it. I then purchased a DSLR, an LPI, an ST-80, a second counterweight, a motorfocus, and later a DSI for guiding. I added a red dot finder to assist in aligning it.

After being frustrated with the weight of the assembly, I purchased the Orion mini finder-guider and removed the ST-80. This helped a lot. In the process of learning this I damaged a RA motor assembly and had to replace that as well. I purchased BackYardEOS for camera control, and later, a laptop and 12 volt charger for it. And only recently after learning the hard lessons of proper balance, proper polar alignment, and even finding my focus points for my guide camera and imaging camera on daylight targets have I reached the point where I can begin to do some imaging.
I still have to learn processing techniques so I can enhance my data. But I am slowly getting there with it. On my last run, I had PHD guiding this system perfectly and everything seemed to be right on track.

The hard lessons on this are the simple ones. There is no easy road. If you are patient and meticulous, and can follow procedures and are tedious about how you do things, you stand a chance of getting results. There are a lot of things that can go wrong, but I can't stress enough that this is not an easy process and there is no quick way to learn it. You need to read lots of advice and listen to others, and you need to get out an practice with your own gear and find the limits of what it can do.
All in all I am pleased with this image of M27. Down the road I hope to get far better images, but just getting this far has put me in the ballpark to do this with at least some success. And that in itself is a milestone accomplishment to me.

Wednesday, August 24, 2011

The Equipment War

It is really easy to get involved in buying a lot of equipment in this hobby. I know first hand having spent a lot of money over the years on things in the learning process.

But honestly, there is nothing greater than using minimal equipment to pursue this hobby in many ways. The simpler you can keep your setup, the more it will be used.

Astrophotography is a different animal. It demands a lot of equipment and patience in setting it all up for an evening of imaging. Lots of things to go wrong. Some wonder why we do it. The answer is simple, it is what we enjoy about his hobby.

I like to play with cameras and electronics. Capturing images is an art in itself. You plan your shots carefully and there is a process of events that takes place to actually get a result. Unlike visual work, it can be very tedious from acquisition to focus to capture to tear down, it is all about the process.

A pure visual observer struggles to understand why we want to do this. Those of us who do this can't understand why more visual observers are unwilling to take the next step in the hobby and begin to save their memories forever.

And the battle rages on to this day.

Saturday, August 6, 2011

A Computer for Astronomy


I finally reached the point of having to buy a better computer. I usually don't spend money on computers much because things change so rapidly and I can get by with older machines for quite a while. But getting into imaging and working with images placed some demands on my needs.

I purchased the Dell Inspiron N5030 from Walmart. This is a very basic laptop with a 320 gig hard drive and 3 gigs of RAM and comes equipped with Windows 7 Home Edition (64 bit).

I have loaded this laptop pretty much for astro usage. I have Deep Sky Stacker which is used for stacking images, as well as Canon Utilities (for the camera driver for my DSLR), BackyardEOS for image acquisition from the DSLR, and PHD Guiding to perform my autoguiding functions.

Additionally I have added some other things. I have installed Stellarium which is a very nice planetarium program, Adobe Photoshop CS5 for processing images, Autostar Envisiage for use with my DSI, and AutoStar Suite for mount control and positioning. Since this laptop came without a serial port, I also added a Keyspan USB to RS-232 to it as well.

I approach computers as nothing but a tool. It should serve some useful function, and in this case it has a purpose. And I really felt the need to move to Windows 7 as most new things will come equipped to use it, and it is a modern operating system with some shelf life to it. After all, we have extracted almost 10 years out of Windows XP at this stage and soon it will be going away. It was simply time to move on and modernize and look at it as an investment into the usefulness of my gear.